Class Create/Details
Parks & Rec > Class > Create (or Search > Edit)
The Class Details page provides the class number, name, status, activity, fee and registration details. The details are organized in groups, which you can expand or collapse for viewing.
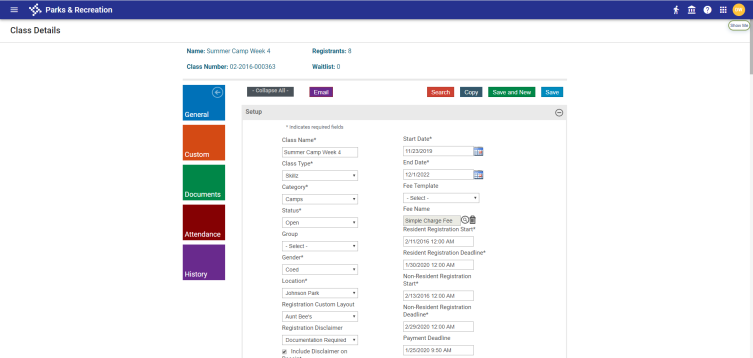
The Setup fields assign a class number, define the class times and fees, specify age requirements, and store the description that is available on the citizen portal. Required fields are identified with an asterisk (*).
Note: Until a class has registrants, an editable Class Number field remains available at the top of the Setup section.
Before creating a class, use the Park & Rec. Setup options on the Administration tab to create class type, category, status, group, and location records.
If this class is available to residents and nonresidents, you must enter fees in the Fee and Nonresident Fee boxes.
In addition to general class information, the Class Details page provides options for determining registrant requirements and assigning miscellaneous administrative settings.
|
Field |
Description |
|---|---|
|
Registration Custom Layout |
Determines the layout template to use during registration. Only templates for which the Show for Registration check box is selected are available. Use the Custom Fields and Custom Fields Layout options on the Administration tab to maintain customized fields. |
|
Registration Disclaimer |
Assigns a disclaimer to the registration process for the class; for example, your organization may have a participation policy that must be acknowledged during the registration process. |
|
Include Disclaimer on Receipt |
Includes the selected disclaimer text on registration receipts. The disclaimer notices set up for your organization are available in the Registration Disclaimer list. |
|
Is Special Event |
Includes this class, along with an uploaded image, in scrolling views on the citizen portal. See Display Images on the Citizen Portal for more details. |
|
Show on Portal |
Makes this class available on your citizen portal. |
|
Restrict to Residents Only |
Excludes nonresidents from class registration. |
|
Restrict to Members Only |
Displays a notation on the Class Details and citizen portal indicating the class is available only to registrants with an active membership. As with resident-only classes, member-only classes are not enforced during registrations processed from the Administration page. Use the Select Memberships list to identify the types of memberships required to register for the activity. |
|
Allow Multiple Registrations |
Allows a registrant to register multiple times for this class, whether registering through administration or the portal. |
|
Restrict to View Only on Portal |
Prevents your organization’s citizen portal from displaying the class in the list of classes available for registration. In this case, when a user views the class description, the Add to Cart option is not available. |
|
Check Specific Boundaries (Add Service to System Settings) |
Enforces registration restrictions according to the specific boundaries defined in the Class Residence Verification Services field in System Settings. This setting works with the residency settings to determine a registrant’s eligibility for the class. |
|
Auto Add Wait List Contacts |
Overrides the global Auto Add Wait List Contacts as Registrants setting in the Class Settings section of System Settings. When a class is created, this check box inherits the global setting. If the auto wait list setting is turned on for a class and the class capacity increases, wait list contacts are added to the class based on the number of seats available. |
|
Attachment Required for Registration |
Enforces the adding of attachments during registration for the class from the citizen portal: The registrant cannot continue with the registration process until the required attachments have been added. |
|
Fee Template |
Assigns to the class a fee from a template set up in Administration. Select from the available templates on the drop-down. If the Class Type has a default fee template, this selection overrides it. Once a registrant is added to the class, the field becomes read only. You may not select both a Fee Template and a Fee Name. |
|
Fee Name |
Assigns to the class a fee set up in Administration. Click the magnifying glass to select from a list of active fees. If the Class Type has a default fee, this selection overrides it. Once a registrant is added to the class, the field becomes read only. You may not select both a Fee Name and a Fee Template. |
|
Resident Registration Start |
Registration start and end dates specific to residents. Residency status is based on the registrant, not the payer.
|
|
Resident Registration Deadline |
|
|
Non-Resident Registration Start |
Registration start and end dates specific to non-residents. Residency status is based on the registrant, not the payer.
|
|
Non-Resident Registration Deadling |
|
|
Age Calculation Date |
Provides the date at which to validate a registrant’s age. When you create a new class or update existing classes, the default date for this field is the class start date. When the Class Start Date is changed, the Age Calculation Date is changed automatically to the updated class start date. |
|
Minimum/Maximum # of Registrants |
Defines the class size. Once the maximum number of participants is reached, registrants are moved to a wait list for the activity. |
|
Minimum/Maximum School Grade |
Restricts class availability according to a student's grade level. Only students who meet the minimum school grade level may register. Contacts who do not have a specified grade level may register along with contacts whose grade level meets the minimum. |
|
Maximum Players/Coaches per Team |
Restrict the number of players and coaches that may be part of a class/team. These fields are visible whenever a Class Type Format of League Individuals is used (Administration > Parks & Rec Setup > Class Type). |
|
Allow Wait List to Remain Open |
Keeps the wait list open past the end of the registration period. |
|
Allow Admin to Overenroll Class |
Makes visible the Overenroll and Wait List buttons on the Class Details page. Overenroll lets you add participants exceeding the maximum number specified without using the wait list feature. |
|
Description |
Stores the class description that displays on the citizen portal. This description should be brief but designed to serve as a short advertisement for the class. The available formatting options for the description text let you set font type and size, add highlighting, and so on. When the text displays on the citizen portal, the formatting effects display. |
|
Coach Description |
Appears below the Description field if the class has a Class Type Format of League Individuals (Administration > Parks & Rec Setup > Class Type). This description appears on the Volunteer as Coach dialog that displays during the coach registration process. |
|
Registration Receipt Note |
Provides notes that are included on the receipt that displays in the citizen portal after registration, on the receipt that is emailed to the registrant after registration, or on an email receipt reprint. The notes display in each class registrant section of the receipt. If multiple class registrations include notes, the notes display with the details for each class on the receipt. If you modify the receipt note text after receipts initially are printed, reprinted receipts contain the original receipt note. The available formatting options for the receipt note text let you set font type and size, add highlighting, and so on. When the text displays on the citizen portal, the formatting effects display. |
When you are creating a class, the Registration Period Exceptions group provides the option for defining early and late registration periods and for assigning fee adjustments for these periods.
![]()
The early and late registration periods must fall within the defined registration period:
- The time period from the Registration Start Date through the Early Registration End Date is the early registration period, and this period will have the early fee adjustment assessed.
- The time period from the Early Registration End Date through the Late Registration Start Date is the standard registration period and will use the standard class fees.
- The time period from the Late Registration Start Date through the Registration Deadline is the late registration period and will have the late fee adjustment assessed.
When an early or late period is specified, a fee adjustment must be added. A class may have any variation of an early or late registration period, but neither is required.
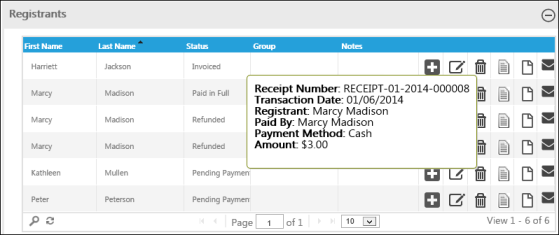
For existing classes, the Registrants group provides a list of participants for the selected class. The Status column displays payment status, the Group column displays the registrant’s assigned class group, if applicable, and the Notes column displays additional information for the registrant.
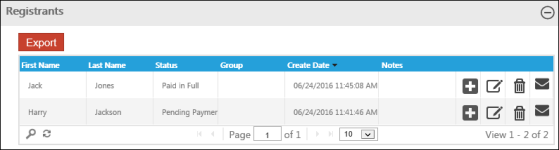
If a registrant has made a partial payment, the entry for the registrant contains two rows: one for the partial payment and one for the total invoice.
When you hover your pointer over the Edit icon for an individual registrant, the program displays receipt details, registrant attachments, notes, and custom fields.
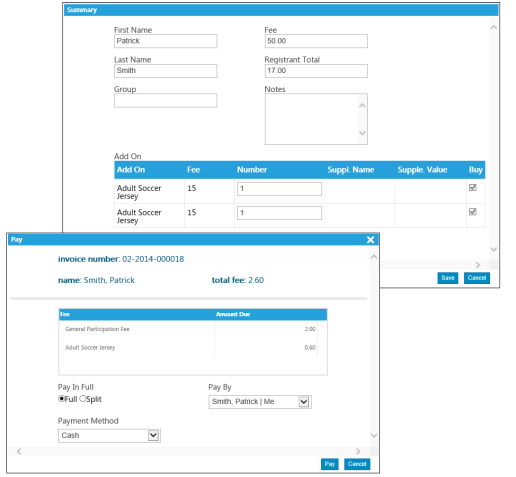
Click Add to pay an invoice or purchase an add-on item. When you complete a transaction from this page, the program does not create a new invoice unless the total value of the invoice changes--for example, you add or remove an add-on item or you change your residency status. If the total does not change, the program uses the existing invoice. If you remove a registration, the invoice is deleted.
If you click Add to pay the invoice for a registrant who has made a partial payment, only the invoiced amount displays.
When you click Save to close the Summary page, the program displays the Pay details dialog.
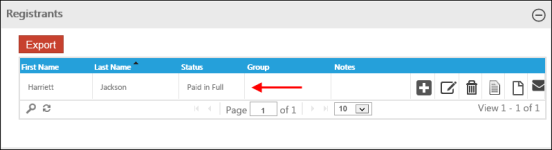
If you complete the payment process, the Status field indicates the change.
Click Delete to remove the registrant from the class and refund payments, if appropriate.
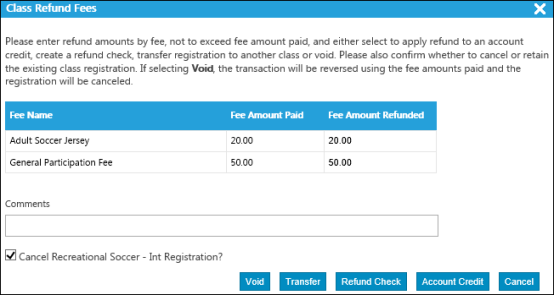
Using the Class Refund Fees dialog, you may void the transaction, which reverses fee amounts paid and cancels the registration, transfer the registration to a different class, process a refund check, or apply the refund to the participant’s account as a credit.
When you hover your pointer over the Status field for a registration that is paid in full, the payment receipt details are provided.
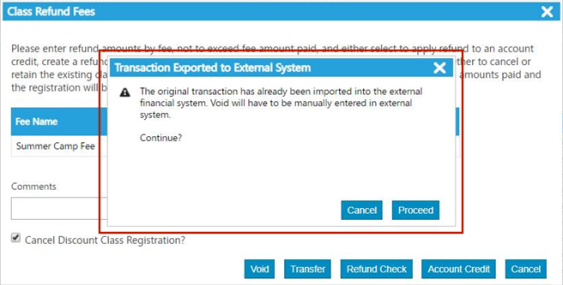
Customers using Incode Version 9 in Collection Export Integration Settings will not include unexported voided collections.
If a collection has been exported, attempting a void notifies the user of the need to adjust the external financial system manually.
A Team Builder link appears at the top of the Registrant section of any class with a Class Type Format equal to League Individuals. The link navigates to the Team Builder page.

Teams provides the name of the teams participating in a class or activity. This pane replaces the Registrants pane for classes defined with the League Teams class type. In this case, one registrant (designated as the captain) registers the team, not the individuals on the team. The Teams pane provides the Team and Captain Name fields.
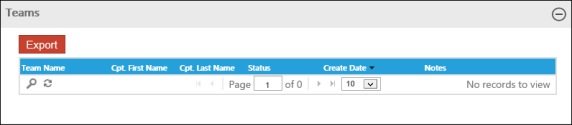
Use the Export button to create an Excel spreadsheet of the teams registered for the selected class or activity.
Wait List provides a list of registrants who are not officially registered for the class due to space limitations but who want to be registered should space become available.
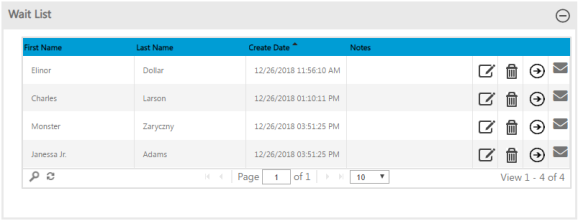
As space becomes available, use the Wait List group to move contacts to the class registration list. When you do so, the program provides the payment options.
Drop In Payments provides the option for accepting payment directly from the Class Details page.
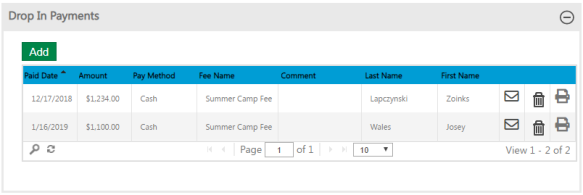
Once payment is accepted and the record is saved, the print and email options are available for receipt printing or delivery. Printed receipts do not require the Payer value to be entered when you complete the payment details; however, the email option is available only when the payer is identified.
To enter an add-on payment, click Add. In the Class Payment dialog, select the fee name and payment method, and then enter the amount, payer, and paid date values. You may identify the payer or add comments.
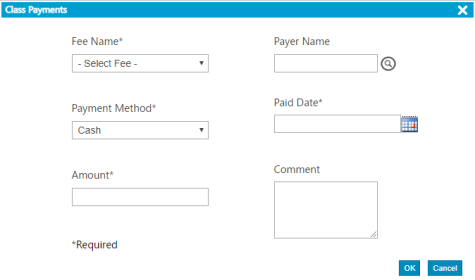
The Payer Name field includes auto-complete functionality. As you type the first few letters of a name, the program provides a list of options that match the text entered. The more text you enter, the narrower the list of options. When the list shows a match, click it to complete the field.
Drop-in transactions are saved automatically. You do not need to save the entire class record for these transactions.
The history of these payments is included in the Class Details record. Also, a transaction is added for the payment and is available using the Transaction Search option.
The Delete button for a drop-in payment provides the option for refunding the payment. When you click Delete, the program displays the Payment Refund dialog, which indicates the drop-in amount. Accept the default amount, or enter a new amount not to exceed the total payment amount. Click Refund to complete the process and save the refund record. Click Void to reverse the payment amount and cancel the transaction.
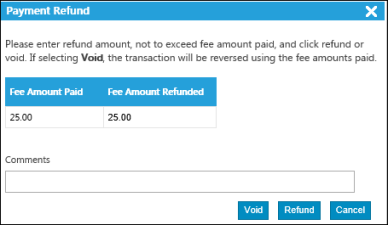
If you select Void, the program displays a confirmation message confirming the void of the entire transaction. If you continue, the action voids the entire transaction and removes all registrations associated with that transaction.
The Instructors section identifies the instructors who are associated with the class. Instructors must have active contact records.
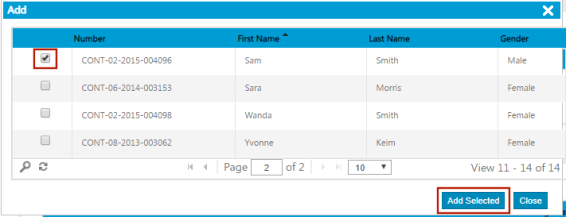
Click Add to assign an instructor to a class. From the list of available instructors, select the check box for the instructor or instructors to add, and then click Add Selected.
Once you have added the instructor, click the Edit icon to assign a payment plan for the instructor using the Plan Type list.
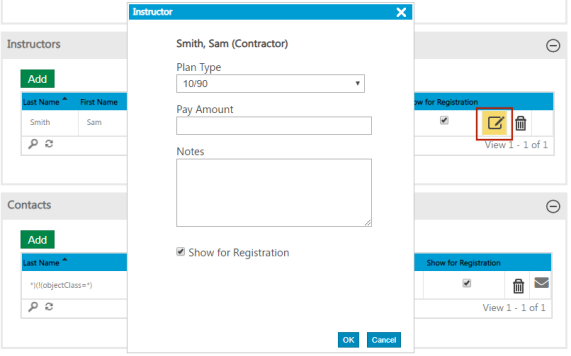
To include the instructor’s name with the class details on the Class Registration page and on the citizen portal, select the Show for Registration check box. When you save the instructor record, the program updates the Plan Type and Show for Registration fields accordingly.
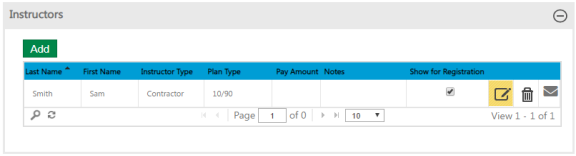
If the instructor record includes an email address, the email button  is available. Click this button to create an email message with the To box completed with the instructor email address and the Subject field containing the class identifier.
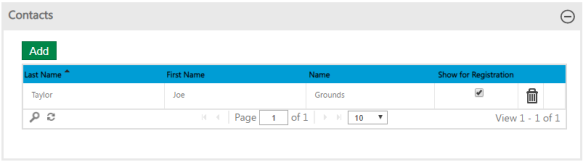
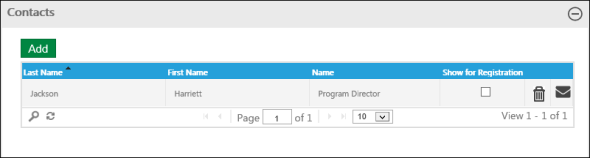
The Contacts section identifies personnel who are associated with a class, such as field staff or monitors. Contacts and contact roles must be defined on the Administration tab.
When you are adding a contact, the Contact field includes the auto-populate functionality. As you type the first few letters of a name, the program provides a list of options that match the text entered. The more text you enter, the narrower the list of options. When the list provides a matching option, click it to complete the field.
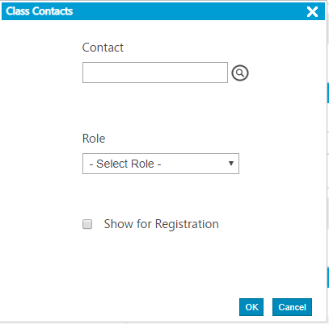
Select the Show for Registration check box to make the contact information available on the citizen portal.
If the contact record includes an email address, the email button  is available. Click this button to create an email message with the To box auto-completed with the contact email and the Subject field containing the class identifier.
The Add-Ons group provides a list of items that are available for the class.

When the Required check box is selected, the add-on item is included automatically in the registration.
When the Show in Portal check box is selected, the corresponding add-on item is shown during the registration process from the citizen portal. The check box is selected and disabled by default. To have an add-on item hidden during registration, clear the Required check box, then the Show in Portal check box.
Add-on records are maintained using the Add-On Types option in the Parks & Rec Setup group on the Administration tab and assigned to classes using the Add button in this group.
Add-on fees are assigned when the records are created, but you may adjust the fee amount for a transaction by clicking in the Fee field and entering a new amount.
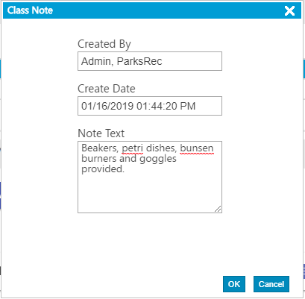
The Notes option assigns a note to the class.
![]()
When you click the Add or Edit icon, the Class Note option provides the Note Text box.
The Schedule pane allows for the variable scheduling and selection of locations and rental items.
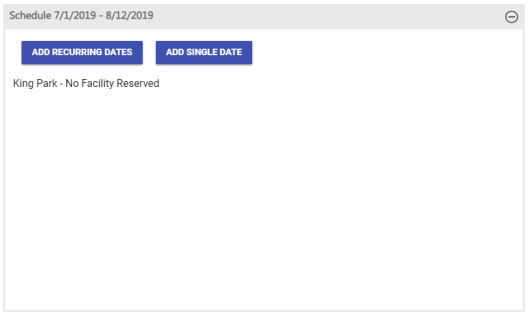
The start and end dates of a selected class display in the section header. Below the section header are buttons to add recurring and single dates. The section also shows the location that has been selected for the class and, if applicable, the facility reserved.
Recurring Dates
To schedule recurring dates for a class, click the ADD RECURRING DATES button. In the dialog that opens, select, at minimum, the days and the start and end times.
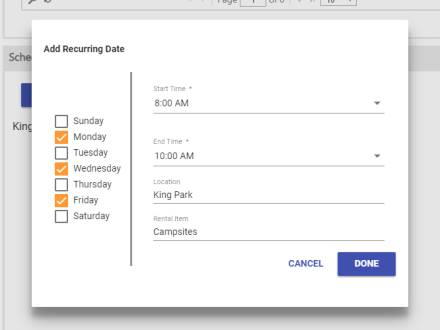
The dialog also contains fields for selecting the class location and, if applicable, rental item, such as a specific facility within the location.
To select a rental item, first select the Location, then the Rental Item. Selecting a Location filters the selections on the Rental Item drop-down to those that are valid for the location only.
Note: Selecting a facility marks it on the facility calendar as unavailable for renting during the scheduled time of the class.
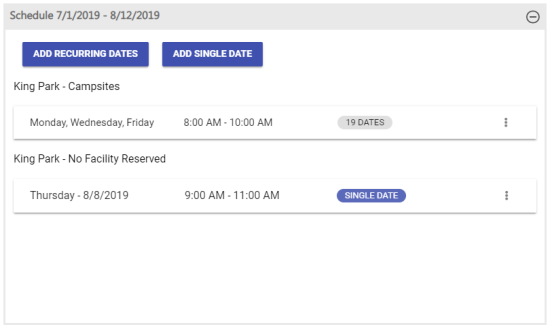
When finished, click DONE. The Schedule pane refreshes, displaying the new entry, including the total number of dates, on an expandable card.
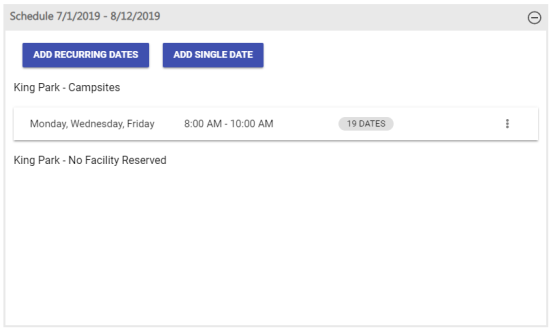
As shown in the image above, cards are grouped under headings containing their corresponding locations and rental items.
For cards that do not have specific locations selected, the heading defaults the location selected in the Setup pane of the Class Details page. For cards that do not have specific rental items selected, the heading displays “No Facility Reserved” next to the location.
To view the complete list of class dates or remove individual dates from the list, click the card to expand it.
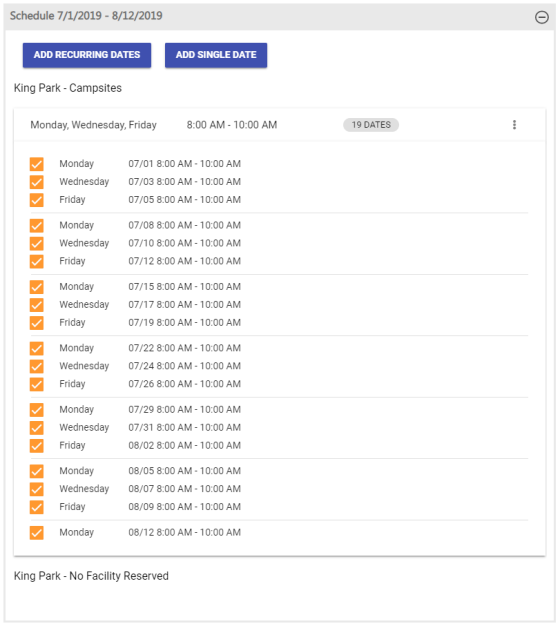
The expanded card shows all scheduled class dates and times that fall within the date range of the class.
If you need to make a custom change and remove specific days from the list, clear the corresponding check boxes.
To edit the days, start and end times, location or rental item of the recurring schedule itself, click the action menu represented by the vertical ellipsis on the right side of the card.
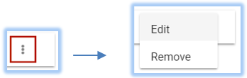
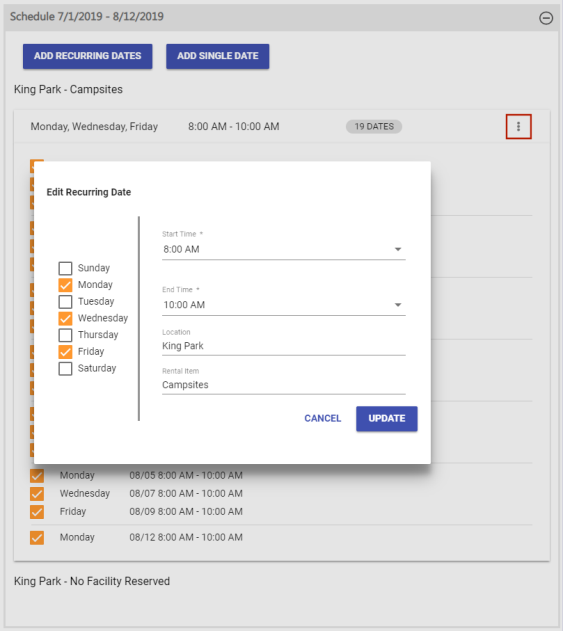
Note: Editing a recurring schedule resets any custom changes to their default states.
To add another series of recurring days for the same class, click the ADD RECURRING DATES button again to repeat the process.
Single Dates
To schedule single dates for a class, click the ADD SINGLE DATE button. In the dialog that opens, select, at minimum, the day and the start and end times.
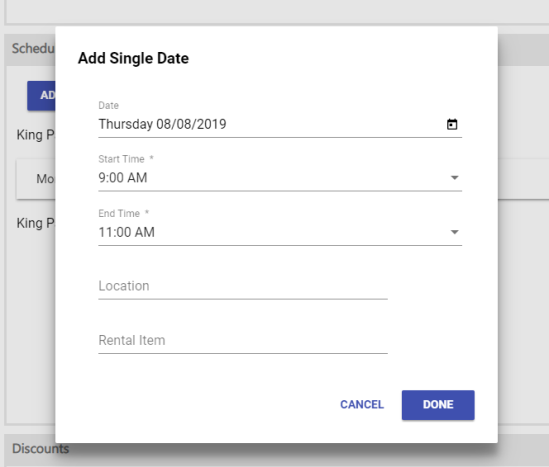
When finished, click DONE. The Schedule pane refreshes, displaying the new single-date entry on a card.
View Schedule
If a recurring schedule has been edited or a single date has been added to a schedule, a View Schedule link appears at various points in the class registration process.
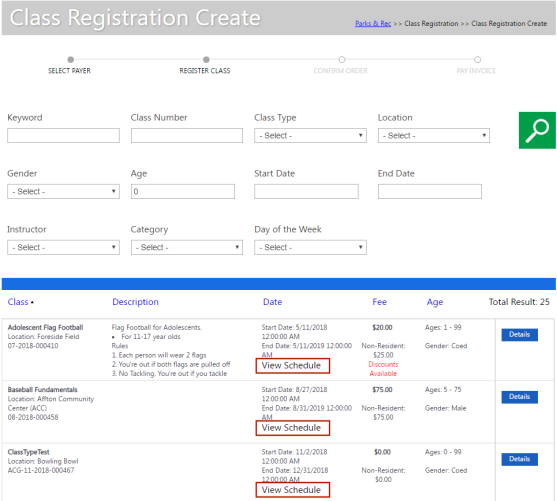
Clicking the link opens a Schedule pop-up containing a chronologically ordered list of all dates and times scheduled for the class.
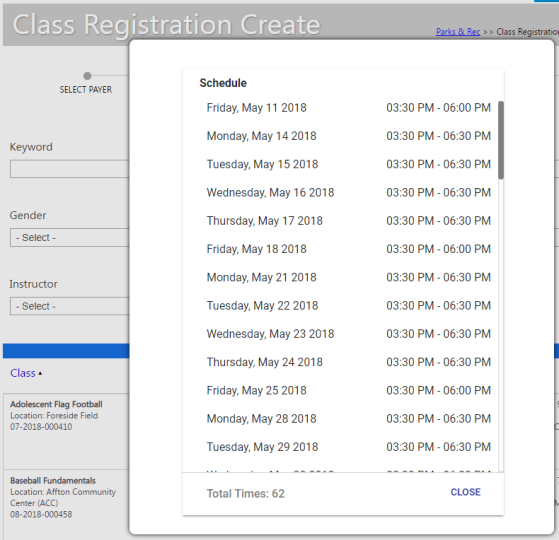
The View Schedule link also appears during the registration process from the citizen portal.
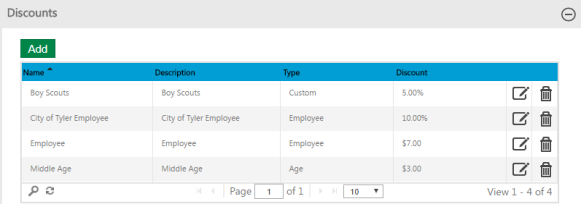
The Discounts pane displays the discounts that have been set up in Administration and applied to the selected class.
Clicking the Add button opens a dialog containing the discounts that are available to be applied to the class.
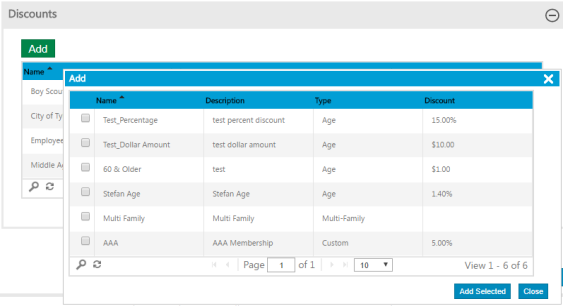
To apply a discount, select the corresponding check box, and click Add Selected.
Clicking the Edit icon opens the Discount Details page, where the details of the discount are available for editing.
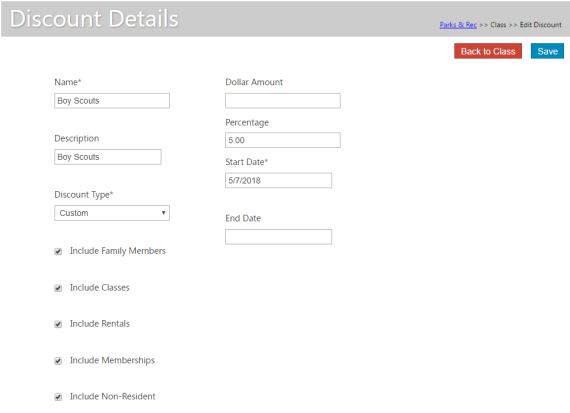
The Name of the discount, the Discount Type, and the Start Date are required entries. A discount Dollar Amount or Percentage also must be entered.
To make this discount available for family members, classes, rentals, memberships or non-residents, select the appropriate check box at the bottom of the page.
Discount Types
|
Discount Type |
Description |
|---|---|
|
Age |
This discount applies to a contact’s age. Selecting Age displays From Age and To Age fields. Any contact whose age falls within the range entered here is eligible for this discount. Both fields do not require entries; for example, if the discount is for seniors, only the From Age needs to be entered. |
|
Employee |
This discount applies to any employee who has the Employee check box checked on the Contact Details page. Selecting Employee displays an Available to Family Members check box. Selecting this check box makes family members also eligible for the employee discount. |
|
Custom |
This discount may apply to AAA members, veterans, boy scouts and other groups of your choosing. All custom discounts are displayed and available for selection on the Contact Details page. Selecting this check box also displays the Available to Family Members check box. |
|
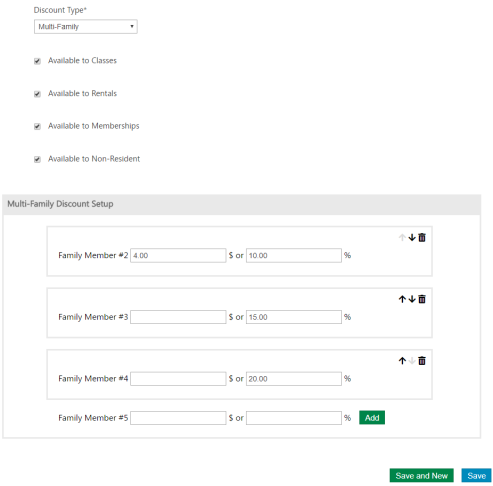
Multi-Family |
This discount applies when a contact registers other family members for the same class or membership. Selecting Multi-Family displays a Multi-Family Discount Setup section at the bottom of the page (see image below). Beginning with Family Member #2, this section contains fields for setting up dollar amount or percentage discounts that apply when additional family members are registered. For Family Member #2, select the discount dollar amount or percentage and click Add. Discount dollar amount and percentage fields for Family Member #3 display the Family Member #2 fields to let you add a discount for a third family member, and so on. You may change the order of the discounts by clicking the up or down arrow to the right of the fields. If the number of family members registered for the same class exceeds the number set up here, the last discount is applied to the additional members; for example, if multi-family discount is set up for family members 2 and 3 only and a fourth and fifth member are registered, the discount applied to family member 3 is applied to members 4 and 5. Existing family class and membership registrations in determining whether a multi-family discount is eligible during a registration. During the registration payment process, the Order Summary displays a discount line item for each family member with the family member number included.
|
To return to the Class Details page from the Discount Details page, click the Back to Class button.